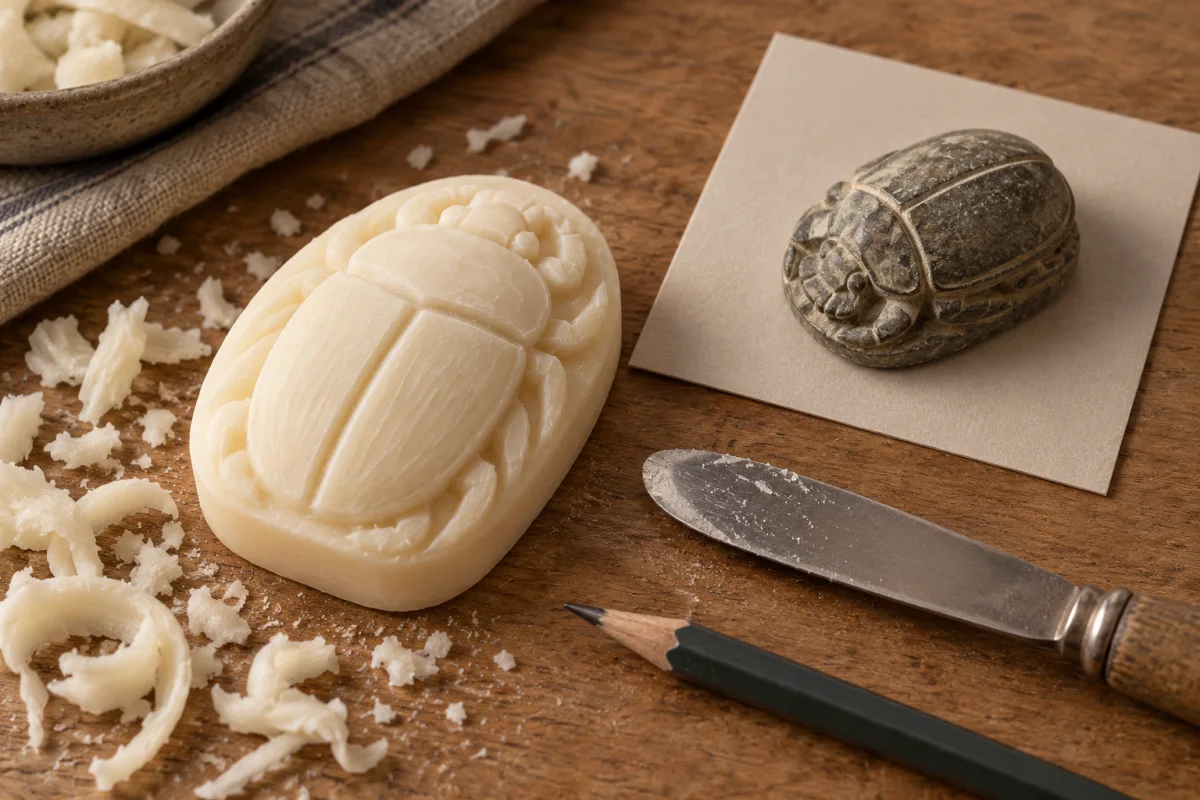
This project uses a modern bar of soap to make a beetle-shaped relief inspired by ancient Egyptian scarab objects. It is a modern craft activity, not a claim that Egyptians in antiquity carved bars of soap. Museum collections describe ancient scarabs carved from steatite, a stone, while this guide uses an ordinary soap bar as a beginner-friendly material.
The shape makes a useful first historical-art project: a rounded back, a central division and a few simple legs are enough to make the beetle recognizable. You do not need to reproduce hieroglyphs, a seal or a museum object.
What the historical reference tells us
A scarab is an object shaped like a beetle. The British Museum’s catalog describes a New Kingdom scarab made of steatite. A Penn Museum example likewise records an Egyptian scarab carved from steatite and mounted as a seal.
Those examples make a better starting point than saying “ancient soap carving.” Steatite is stone; soap is a different, modern craft material in this project. Treat museum objects as visual references and inspiration, not as templates to copy exactly. The aim here is to learn to plan a raised shape, remove small amounts of material and make shallow details.
Materials
- One firm bar of plain soap that you can hold securely.
- A soft pencil.
- A rounded, familiar carving tool suitable for your age and skill level.
- A toothpick or blunt wooden skewer for light guide marks.
- A dry, folded towel to stop the bar sliding.
- A sheet of paper for the first drawing and a shallow dish for the soap shavings.
A sharp craft knife is not necessary for this beginner project. If children are participating, a responsible adult should choose the tools, demonstrate safe use and actively supervise throughout. Always follow the soap and tool makers’ directions.
Draw the scarab before touching the soap
Make a simple paper sketch approximately the size of the broad face of your soap bar:
- Draw a vertical oval for the shell.
- Add a small triangle at one end for the head.
- Add two small side marks for the front legs and two more for the back legs.
- Draw one shallow line down the center of the oval to suggest the seam between the wing covers.
- Leave a margin around the edge. It gives the shape room and helps the bar keep its strength.
Keep the design broad. Thin projections and deeply cut legs are the first areas likely to chip. You can leave small parts implied by shallow lines instead of carving them as separate pieces.
Carve the raised scarab step by step
1. Stabilize and mark the bar
Fold the towel into a firm pad, place the soap on it, and check that it will not slide with gentle pressure. Lightly transfer the oval, head and leg positions to the soap with a pencil or blunt pick. Rotate the bar to inspect all sides before you begin removing material.
If the bar slides, change the setup. Do not hold it in your palm while cutting.
2. Establish the outside shape
Use short, shallow strokes to lower the soap outside the oval, leaving the central shell raised. Work evenly around the outline instead of digging into one deep trench. Turn the bar on the towel when you need a new working direction; keep the supporting hand away from the tool path.
Pause often to check the silhouette from above. If the oval looks uneven, gently adjust the wider side rather than carving the whole shell thinner.
3. Shape the head and shoulders
Define the small head with one or two light cuts, keeping a wide connection to the body. Add the shoulders where the head meets the shell as a soft notch rather than a narrow neck. Narrow joins can break if you keep carving around them.
4. Add simple legs
Use the wooden pick to mark four pairs of shallow lines or small notches around the shell. The lines can suggest legs without removing large pieces. If the soap begins to crumble at a detail, stop refining it and leave a broader shape.
5. Incise the shell seam
With a light touch, draw one shallow line down the center of the raised shell. Do not cut through the shell or carve a deep channel. A gentle mark is enough to make the two sides readable.
6. Smooth only what needs it
Brush loose shavings away with your fingers once the tool is safely set down. Soften rough corners with a small, controlled scrape. Leave enough relief that the raised body is still visible; over-smoothing can erase the form.
7. Inspect the work
Set the tool down and view the scarab at eye level. Check that it sits steadily, the raised body is attached on all sides, and no edge is razor-thin. Photograph the result beside your sketch, not over an ancient object image copied from a museum’s website.
Why this project is good practice
The process builds three useful carving habits. First, draw a clear silhouette before removing material. Second, keep raised forms broad while you lower the surrounding soap. Third, save small details until the main shape is strong. Those habits work for many beginner carvings, from animals to simple leaves.
For another gentle first project, see our soap-carving guide for beginners. Our guide to carving techniques explains how to make shallow lines and smooth a form without overcutting.
Common mistakes
- Carving the seam too deeply: it can split or weaken the shell.
- Making legs too thin: a shallow groove suggests the form with less risk.
- Cutting while holding the soap in your hand: a stable towel-covered table gives your hands a clearer job.
- Copying a seal’s inscription as decoration: this project is inspired by the scarab form; it does not teach hieroglyphic writing.
- Treating stone and soap as the same material: steatite is a stone used in the cited artifacts. This guide uses household soap for a modern activity.
- Using a sharp tool without supervision: select an age-appropriate tool and have an adult supervise children.
FAQ
Did ancient Egyptians carve bars of soap?
This guide makes no such claim. The cited museum examples are scarabs made of steatite, a stone. The soap-bar scarab is a modern craft inspired by the shape of those objects.
What is a scarab?
Here, “scarab” means the beetle form used as the inspiration for the carving. Museum collection records document examples and their materials; see the British Museum and Penn Museum records above for specific objects.
Can children try this soap-carving project?
Children can take part only with an adult choosing appropriate tools and actively supervising them. Use a stable work surface and a safe tool that suits the child. If you cannot supervise the cutting directly, make the drawn design together and let the child decorate or trace it instead.
Which soap should I use?
Choose a firm, plain bar that is comfortable to hold and does not crumble during a light test mark. Bars vary, so test a spare corner with a shallow stroke before committing to the outline.
How do I keep the soap from breaking?
Use short, light strokes, keep the raised body broad, and avoid thin legs or a deep center groove. Stop if the bar begins to crack, crumble or slide.
Sources
- British Museum: steatite scarab, Museum no. EA27897 — material and New Kingdom collection record.
- Penn Museum: Egyptian steatite scarab E13055 — artifact material, form and context.