01 Before anyone picks up a tool
Make the room ready.
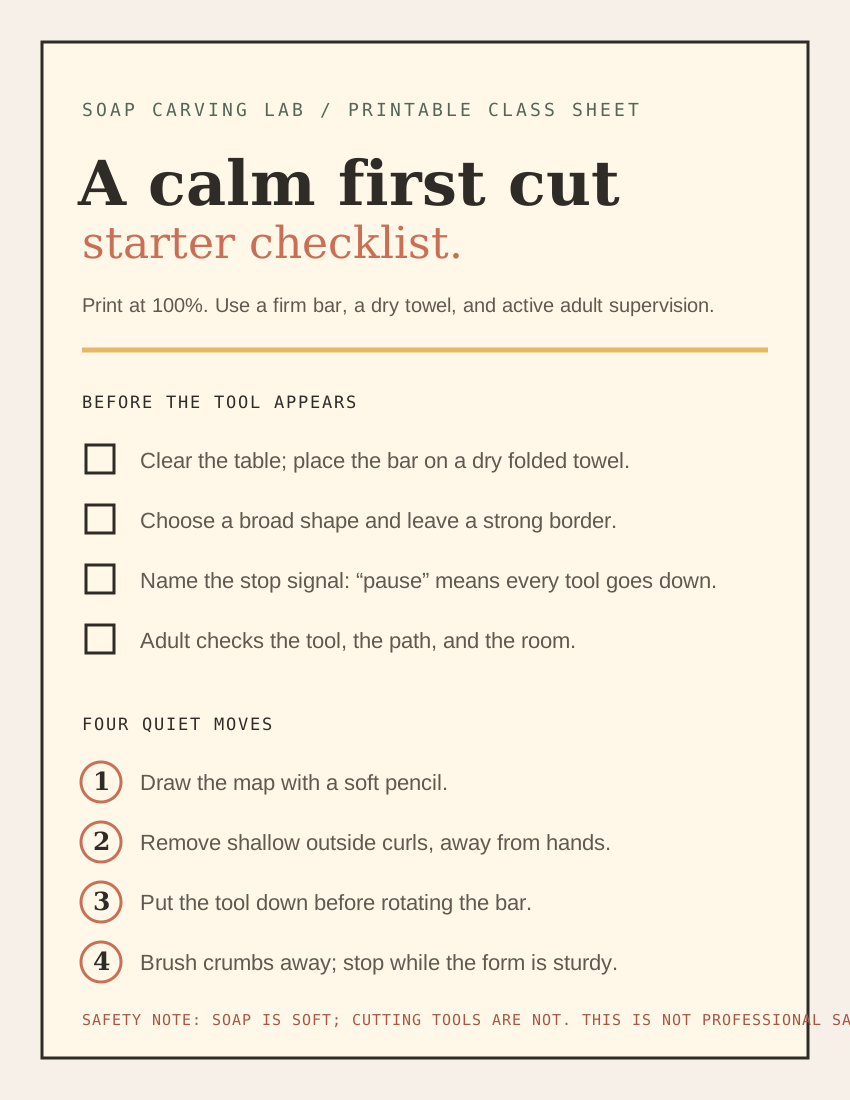
A soap carving activity for kids is a supervised craft, not an unsupervised knife exercise. Set up each place before the group arrives. Use firm, plain soap; a dry towel; a soft pencil; and only the rounded tools an adult has selected for that age group and setting. Check local school or family policies before you begin.
Place every bar on a stable, non-slip towel with the work area clear.
Use broad templates: leaf, heart, fish, or a simple flower without thin projections.
Decide who handles each tool and keep sharper blades with the supervising adult.
Keep soap chips off food surfaces and finish with a hand-washing routine.
Match the job to readiness.
There is no single age that makes a cutting tool appropriate. Watch for observable habits: can the child sit at the table, follow a one-word “pause” cue, keep the free hand away from the tool path, and hand the tool back when asked? If not, make the session drawing-led. The child can choose a shape, trace the template, point to the waste, and let the adult do the shaping.
Planning roles
- Choose and resize a broad outline.
- Draw a centerline or one large detail.
- Point out which soap should remain strong.
- Brush shavings onto the paper at a pause.
Shaping roles
- Use a selected rounded tool only when the adult can see every pass.
- Make one shallow curl, then put the tool down.
- Wait for the adult’s check before turning the bar.
- Return to pencil work when control becomes uncertain.
Prepare a safe, printable activity.
Review the soap carving safety guide, choose a broad outline from the printable soap carving templates, and prepare the table before the group arrives.
02 A 30-minute lesson plan
Four stages, one small form.
Notice
Feel the bar and draw a map.
Invite the child to describe the soap: smooth, firm, rounded, cool. Then draw a broad shape with a pencil. Talk about the border as “the strong soap that keeps the idea together.”
Choose
Decide what stays.
Before removing anything, point out the main outline, the center, and the parts that should remain thick. Children can choose an eye, vein, or line to add later; the design should not depend on tiny details.
Shape
Take little bites with a pause.
With the selected tool and adult guidance, remove one small outside curl at a time. Pause after each side so the child can rotate and inspect the bar. Keep cuts directed away from hands and stop if the surface starts to crumble.
Share
Describe the choice, not just the result.
Ask what changed, what was left strong, and where the light falls. A finished shape can be uneven and still successful. Photograph the work before cleanup if the child wants a record.
For a 30-minute session, allow about five minutes for table rules and drawing, fifteen for broad outside cuts with pauses, and the final ten for viewing, naming, photographing, and cleaning. If attention drops, end at the silhouette. A shorter finished activity is better than adding a rushed detail.
03 What the grown-up does
Protect the boundary, not the outcome.
The adult is responsible for the environment, the tool choice, and the stop signal. The child can own the drawing, the pacing, the color choice, and the story of the shape. Resist fixing every wobbly side: a calm, imperfect object teaches more than a perfect one made by someone else.
prepare the table and tools
model one safe, shallow movement
pause before the room gets rushed
Make the stop signal visible in a group.
Use one word such as “pause” and rehearse it before tools appear. In a classroom, hand out one tool at a time only after every bar is on its towel; collect tools before anyone stands, swaps seats, or reaches across a table. Keep the adult’s hands available for turning a bar or taking a tool, not for correcting every line.
Choose responsibilities by ability, not by who finishes first. A child who is still learning the boundary can be the pattern designer, chip sweeper, or photographer. Children who can reliably stop and keep a clear path may try the selected rounded tool while the adult watches the entire movement. Any sign of rushing, repeated slipping, or frustration is a cue to return to pencil work or pause for the day.
Keep the first shape generous.
The pocket heart is a short, forgiving lesson in two curves and one point.
04 Family and classroom questions
Make room for questions.
Is soap carving safe for kids?
It can be a useful supervised craft when an adult selects age-appropriate tools, stays present, controls the work area, and teaches a clear stop signal. It should not be treated as an unsupervised knife activity.
What is the safest soap carving tool for children?
Use the least aggressive tool that can do the job, often a soft pencil for mapping and a rounded edge under close adult supervision. Tool choice depends on age, motor skills, setting, and local guidance.
What shapes work best for a classroom?
Broad, low forms such as leaves, hearts, fish, and simple flowers are easier to hold. Avoid thin tails, tiny points, deep undercuts, and designs that require detailed symmetry.
Can children use popsicle sticks?
A wooden stick can be useful for marking, pressing, or moving chips, but it does not replace adult judgment about cutting tools. Keep the activity focused on drawing, shallow shaping, and safe supervision.
What if a child is not ready to use a tool?
Keep them fully involved without cutting: scale and decorate the template, draw the centerline, choose the next pass, or describe the shape while an adult removes material. Participation does not have to mean handling a blade.