Editorial check: 2026-09-25 · Written for general education by Soap Carving Lab. Tools can cut; adults should actively supervise children. This is not professional safety advice.
23 Instrument / beginner project
Carve a violin from soap.
A violin soap carving is recognizable through its narrow waist, curved body and long neck. Keep those parts connected to the bar, then use only a few shallow marks for the bridge and f-shaped sound openings. Thin strings and freestanding pegs are not needed.
Begin the six quiet stages ↓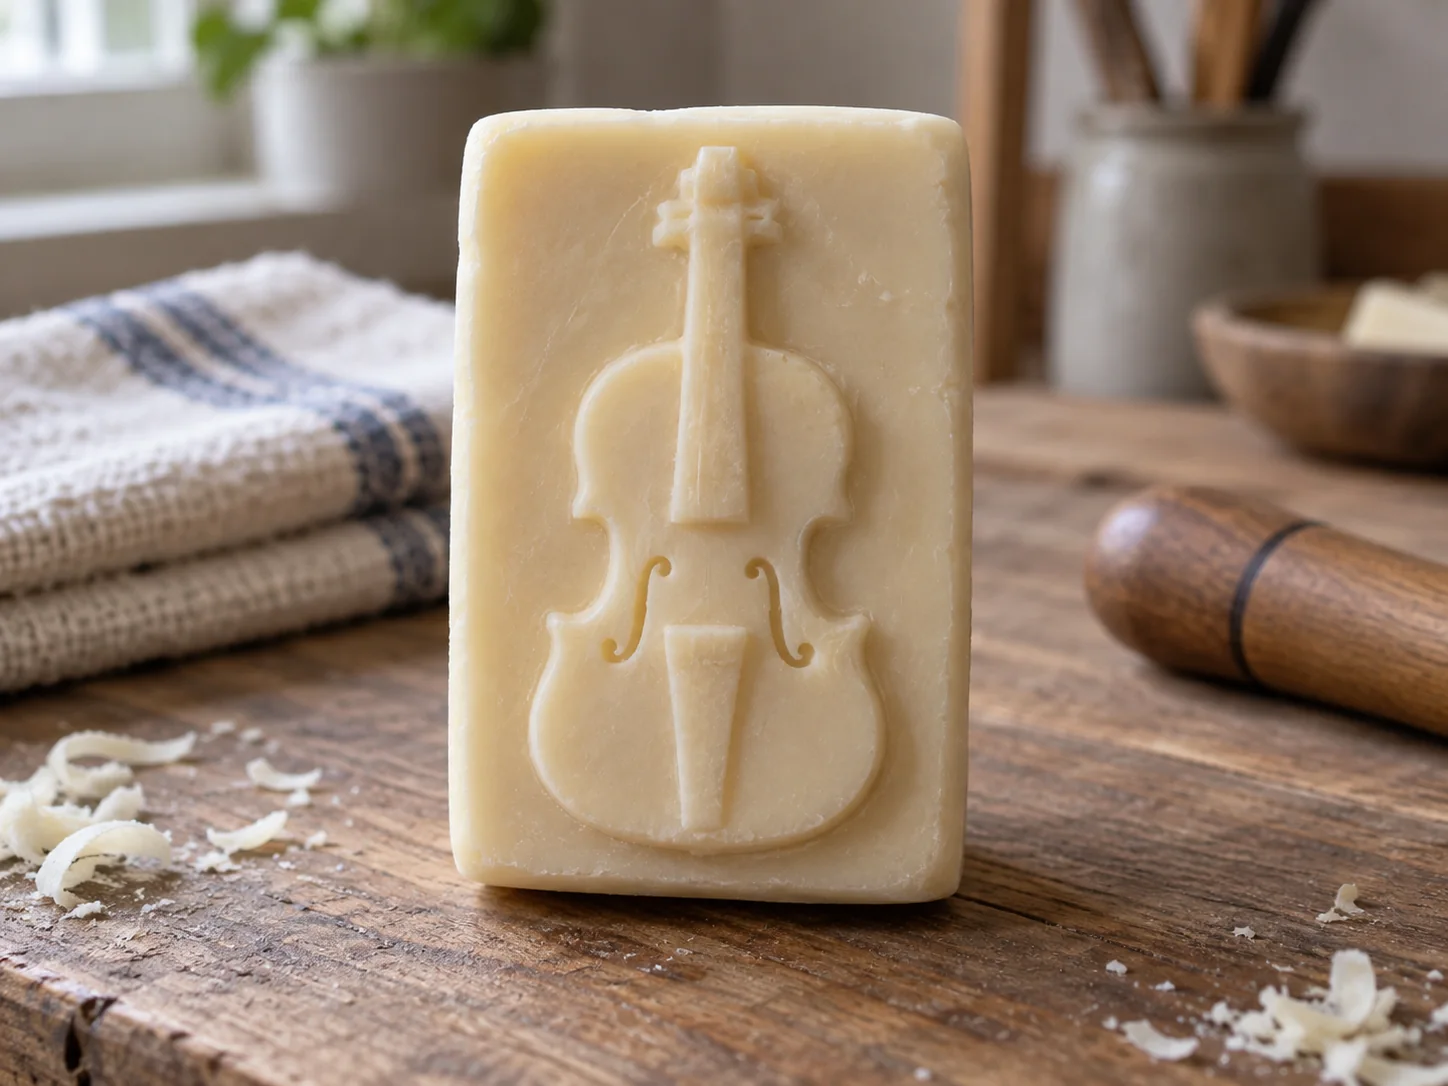
01 Set the bench
Give the instrument a bar with room.
The body and neck should sit comfortably inside the soap outline. This is a shallow relief, not a freestanding miniature. See the soap guitar project for another instrument shape and compare how a different body profile changes the drawing. Read the safety guide before using any sharp tool.
- 01One firm, plain bar
Choose a broad face and avoid a bar that crumbles under light pressure.
- 02A soft pencil
Sketch the body, neck, scroll and margins before carving.
- 03A rounded butter knife
Shape the outer silhouette and lower the background safely.
- 04A toothpick or wooden skewer
Score a bridge and shallow sound marks on the face.
- 05A folded tea towel
Support the bar, catch crumbs and keep the work surface steady.
02 Six quiet moves
Let the violin take shape.
Use the long direction of the bar for the neck and body. Work from the waste toward the outline, turn the bar to keep your supporting hand clear and inspect the side profile before removing more. A shallow, supported pass is easier to control than one deep cut.
- 01
Bar / orient
Choose the long face.
Dry the bar and lay it on the towel. Turn its longest direction upright or sideways according to the face; the violin and scroll must fit with a margin at both ends. If the soap rocks, adjust its position before drawing.
- 02
Pencil map / silhouette
Draw the body before the details.
Mark a broad upper shoulder, a clear narrow waist and a fuller lower bout. Add a neck from the center of the shoulders and end it in a simple scroll while leaving soap around it. Keep the waist rounded; a deep inward notch makes the body look brittle.
- 03
Waste / block
Lower the background around the body.
Begin beyond the outline and remove small curls. Work along one side of the neck, rotate the bar, then repeat on the other. Leave a continuous raised connection beneath the neck and around the scroll. Do not cut a channel all the way across the bar.
- 04
Body / refine
Round the shoulders and waist.
Use short passes to clarify the violin's curved outline. Keep the lower body broad and let the waist taper gently into it. View the relief from the side: if the body or neck looks like a thin flap, stop lowering the background and leave more supporting soap.
- 05
Details / suggest
Add the bridge and sound marks lightly.
Score a small bridge across the lower body and place a pair of shallow f-shaped marks on either side. A few low parallel lines can suggest strings, but keep them incised into the surface rather than raised as thin strands. The shape should still read when the details are ignored.
- 06
Surface / finish
Keep the instrument connected.
Brush away crumbs and inspect the body, waist and neck from above. Round only rough edges that do not weaken the shape. Leave the carving to rest on the towel and stop while the central ridge and neck remain broad.
Form note / connected instrument relief
Let the waist separate it from a guitar.
A violin soap carving has a different outline from the guitar project even though both use a long neck and broad body. Draw a narrower waist, curved shoulders and a compact bridge area. Two small f-shaped marks can suggest the instrument; a guitar is more often read through a larger round sound-hole mark and a broader body.
Keep those details shallow, because they are surface cues rather than structural openings. The aim is a violin-shaped relief that can be read from across the bench, not a fragile copy of every fitting. If your bar is narrow, simplify the scroll and sound marks before you reduce the neck width. The guitar carving lesson provides a useful comparison, while the beginner guide covers the first drawing and tool setup.
One focused example / supported neck
Keep a continuous spine beneath the neck.
Before you cut, imagine a line of uncut soap running from the center of the scroll down the neck and into the body. Lower the background beside that line, not through it. This spine is part of the relief and is what keeps the instrument connected to the bar.
- Draw the neck broad enough to remain obvious after the edges are softened.
- Lower one side of the background in short passes and leave the center ridge high.
- Turn the bar and repeat on the other side, keeping the ridge continuous at the shoulders.
- Stop if the neck flexes or the soap powders; simplify the scroll instead of thinning the spine.
A pencil-width neck is not a universal safe dimension; bars and soap vary. Judge the actual material and keep more support when uncertain.
03 Rescue plan
Keep the instrument whole.
Stop when a detail asks for more pressure than the bar can take. The problems-and-fixes guide can help you choose a simpler finish.
- The neck looks weak.
- Stop lowering the background, leave more soap beneath it and reduce the scroll detail. Do not pick up the bar by the neck.
- The outline reads as a guitar.
- Make the waist more visible through the outline, add curved shoulders and use paired shallow sound marks instead of a round hole.
- The f-shaped marks crumble.
- Widen and shorten the marks, or replace them with two shallow curves. Details are optional; a clean silhouette is enough.
- The body looks flat.
- Keep it flat if the silhouette reads. If more depth is safe, lower a small area beside the body evenly rather than hollowing the center.
05 Five useful answers
Questions from the towel.
How do I carve a violin relief from soap?
Sketch the violin upright on a firm bar, with a broad hourglass body and a neck that stays attached to the soap. Lower the background in shallow passes, round the shoulders and waist, then add a small bridge and shallow f-shaped marks.
How is a violin soap carving different from a guitar?
A violin relief uses a narrower waist, curved shoulders and a smaller bridge area. Shallow f-shaped sound marks help distinguish it from a guitar's broad body and round sound-hole mark.
Can I carve strings and tuning pegs into the soap?
For a beginner relief, suggest strings with a few shallow lines and leave pegs as a simple outline. Thin raised strings or separate pegs can break, so keep details on the surface and connected to the bar.
How do I stop the violin neck from breaking?
Leave a broad continuous neck and keep its connection to the body intact. Lower the background around it without cutting a trench through the soap, and stop if the neck begins to flex or crumble.
What soap should I use for this project?
Choose a firm, plain bar with a broad face and clean edges. A very soft or crumbly bar makes it harder to keep the neck, waist and narrow body details intact.