Editorial check: 2026-09-23 · Written for general education by Soap Carving Lab. Tools can cut; adults should actively supervise children. This is not professional safety advice.
20 Personalization / beginner project
Carve letters into soap.
Soap carving letters becomes much easier when the design is broad, connected and planned in reverse before the first cut. Start with a firm dry bar, map one or two simple initials, remove the surrounding waste in shallow passes and keep every stroke strong enough to survive handling.
Begin the six quiet stages ↓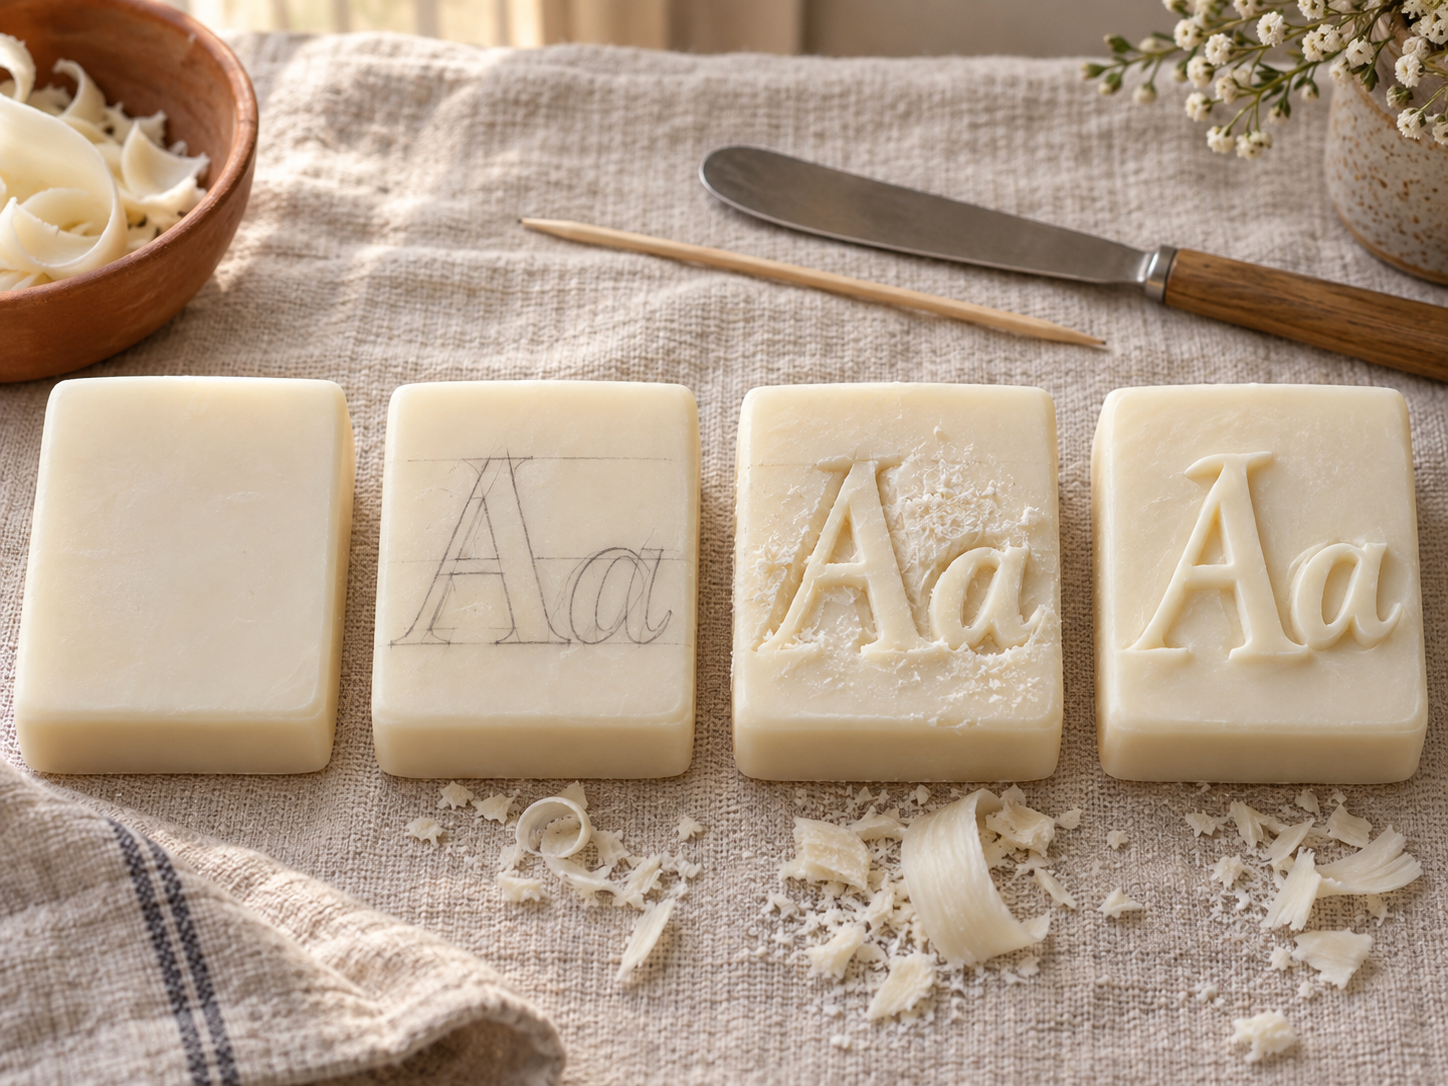
01 Set the bench
Give the letters a bar with room.
Letters need spacing and sturdy bridges more than tiny detail. Work on the broadest face, keep a generous margin and test the soap with one light curl before drawing the design. See the best soap for carving guide for the material test, then read the safety guide before using any sharper tool.
- 01One firm, plain bar
Choose a broad face with room for the design.
- 02A soft pencil
For guide lines, margins and letter spacing.
- 03A rounded butter knife
For removing the broad waste areas.
- 04A toothpick or wood skewer
For shallow letter strokes and corners.
- 05A dry tea towel
For grip, crumbs and a stable bench.
02 Six quiet moves
Let the letters surface.
Read the sequence from block to finish. Turn the bar instead of twisting your wrist, keep each pass shallow and inspect the form before making it thinner. The soap carving techniques guide explains the same pressure rule in more detail.
- 01
Bar / orient
Choose the writing face.
Place the bar flat on the towel and select the broadest, most even face. Leave a margin on every side so the letter design does not run into a weak corner. Test one light curl before you begin.
- 02
Pencil map / margins
Plan the letters before the cuts.
Draw a light baseline and top line, then place one or two simple initials with wide strokes. Keep the gaps between letters larger than the pencil line and avoid narrow bridges that would crumble.
- 03
Waste / block
Lower the space around the strokes.
Remove the soap outside the letter shapes in short curls. Work from the waste toward the guide, rotate the bar often and leave the actual strokes high and connected. Do not chase the final depth on the first pass.
- 04
Form / clarify
Make the letter strokes readable.
Use the toothpick or rounded edge to deepen the main grooves a little at a time. Keep corners soft, preserve the baseline and check the design from straight on before removing more material.
- 05
Surface / finish
Clean the cuts without thinning them.
Brush away crumbs, soften sharp edges and widen a cramped gap rather than making a stroke narrower. If the design is a monogram, let the large strokes carry the identity and skip tiny flourishes.
- 06
Base / rest
Stop while the form is strong.
Flatten the underside if the bar rocks, inspect every bridge and leave the carving to air-dry on the towel. The letters are finished when they read clearly from a normal distance and the bar can be handled without flexing.
Form note / connected silhouette
Make the big shape do the talking.
Soap carving letters are a relief project: the background goes down while the letter strokes remain as one connected surface. A simple block or serif-style initial is easier to read than a thin script. Start with one large letter, then add a second only when the spacing and margins still feel generous.
If you want a personal monogram, sketch it on paper first and simplify every crossing. Keep the design as a positive shape in the soap instead of cutting isolated grooves that divide the bar. The soap carving templates guide can help you think about outlines and margins, while the soap carving techniques guide covers shallow pressure and clean passes.
One focused example / block letter
Try a bold block S.
For a soap carving letter S, begin with one uppercase shape on the broadest face of the bar. Trace the outline lightly, keep a wide border around it, and plan to lower the soap around the letter instead of cutting a deep groove through it.
- Print the outline at a size that fits the bar and check that the border remains visible.
- Remove the outside waste in short, shallow passes, turning the bar instead of twisting your wrist.
- Keep the top and bottom curves broad; soften any narrow bend before it becomes fragile.
- Stop when the S reads clearly from the front and the surrounding soap still supports it.
This single-letter example extends the same connected-relief method used for initials and monograms.
03 Rescue plan
Keep the form whole.
Thin points are the first things to go. Broaden the nearby shape instead of forcing a delicate repair, and use the problems-and-fixes guide if the bar starts crumbling.
- The letters look crowded.
- Erase or soften one letter, enlarge the gaps and keep the outer margin. Spacing improves legibility more than extra detail.
- The strokes crumble.
- Stop deepening them, broaden the letter and use shallower cuts. A strong block shape is better than delicate script.
- The design reads backwards.
- Check the face before carving and keep the guide drawing visible until the main waste is removed. For a relief, think of the letters as shapes that remain high.
- The bar rocks.
- Level one underside high spot with a light pass. Do not compensate by thinning the letters or cutting a deep groove through the base.
05 Five useful answers
Questions from the towel.
How do you carve letters into soap?
Draw simple, wide letters on a broad face, remove the surrounding waste in shallow passes and keep the strokes connected. Deepen the grooves gradually, then soften edges and let the bar dry.
What letters are easiest for soap carving?
Bold block capitals with wide strokes and few narrow crossings are the easiest starting point. A single initial is simpler than a thin cursive word.
Can I carve a name into a bar of soap?
You can make a short, simplified name or monogram if the bar is large enough. Keep the letters wide, the spacing generous and the design shallow enough to remain strong.
How do I stop soap letters from breaking?
Use a firm bar, draw broad strokes, remove waste before details and leave thick bridges around every letter. Stop if a cut needs force or the soap begins to powder.
Can children carve letters into soap?
Children need active adult supervision from setup through cleanup. Use a stable table and rounded tools, choose large simple shapes and keep sharper blades under direct adult control.