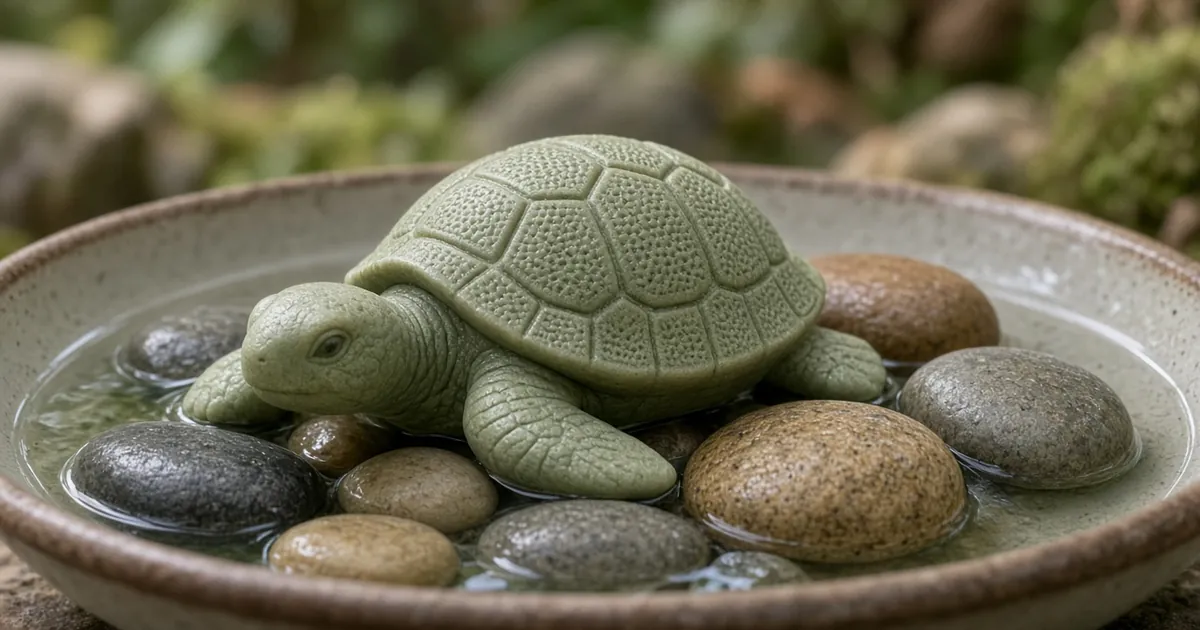
To carve a turtle from soap, round the corners off a firm bar until it’s low and pebble-shaped, draw an oval shell on top, cut four short teardrop flippers and a head at the sides, then score a shallow shell grid with a toothpick. It takes about 25 minutes. A turtle is one of the most forgiving soap carvings: its shape is broad and low, and the flippers don’t have to match.
| Project | Level | Time | Soap | Tools |
|---|---|---|---|---|
| Soap carving turtle | Easy | ~25 min | One firm, full-size bar | Butter knife, pencil, toothpick, towel |
What you need
- One firm bar: dry, full-sized, room temperature, and holding its corners. Pale or unscented makes the marks easier to see. See the best soap for soap carving.
- A rounded butter knife for shallow cuts
- A toothpick for the shell grid and one tiny eye
- A soft pencil to map the shell and flippers
- A tea towel for grip and to catch chips
Put the towel on a stable table. Turning the soap is easier than twisting the knife around a fixed shape.
How to carve a turtle out of soap: 4 decisions
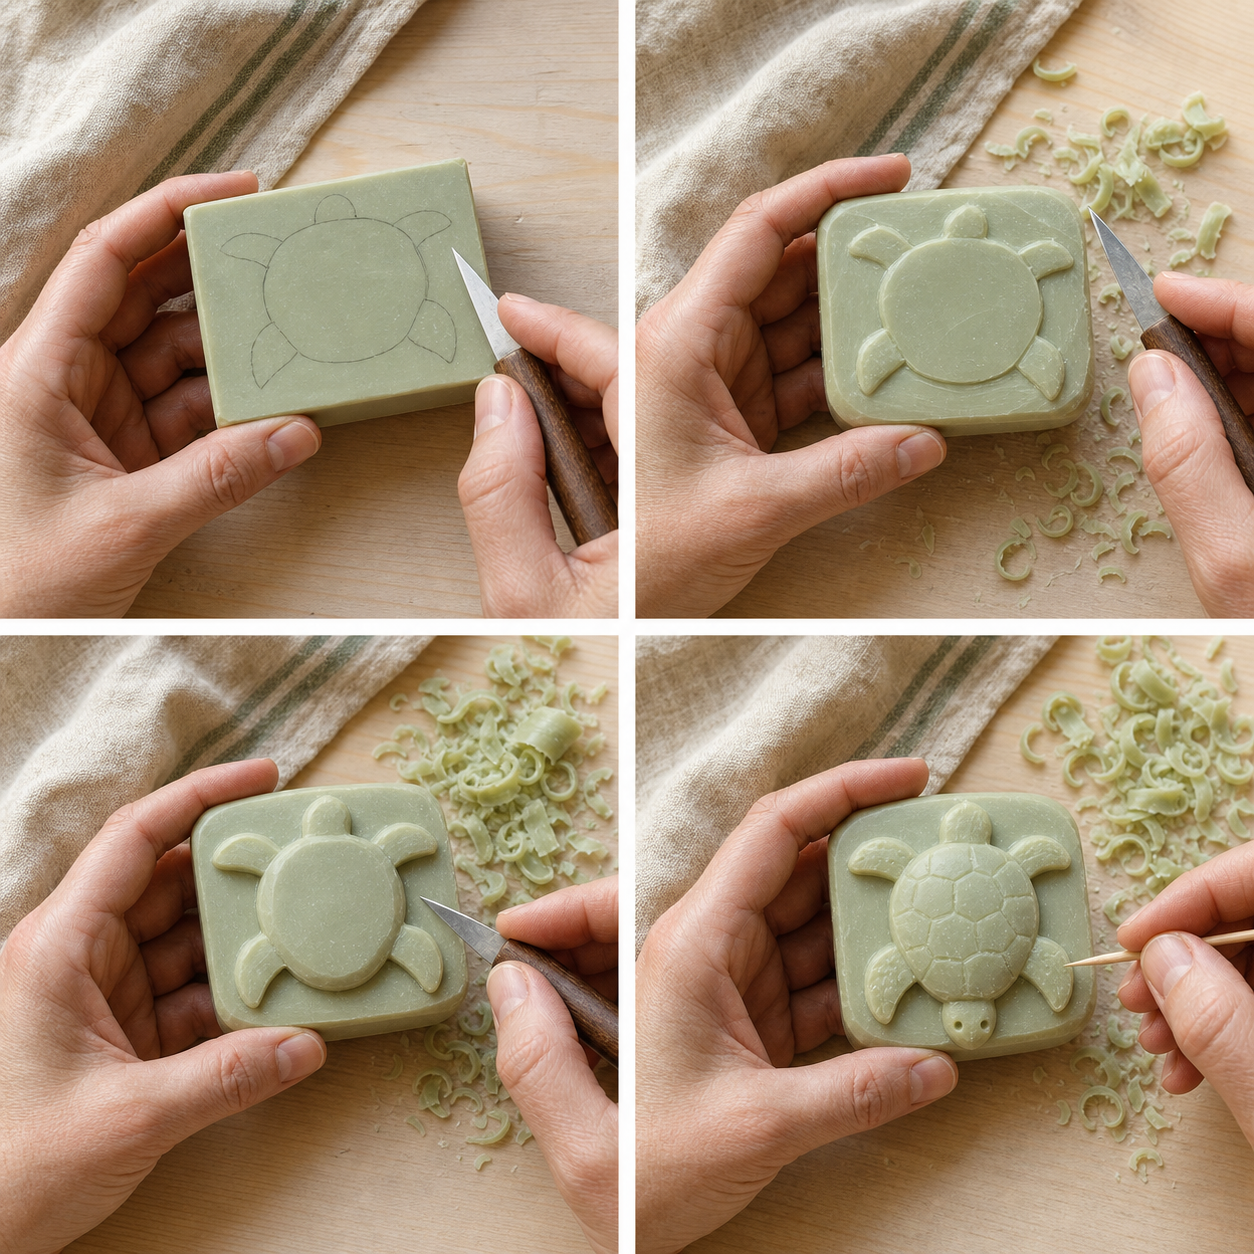
1. Round the bar
Wrap the bar in the towel. Shave off each corner in short, shallow passes with the rounded edge of the knife, turning after every few cuts. Stop when it feels low and wide, like a smooth pebble. Keep the underside flat so the turtle sits instead of rocking.
2. Shape the shell body
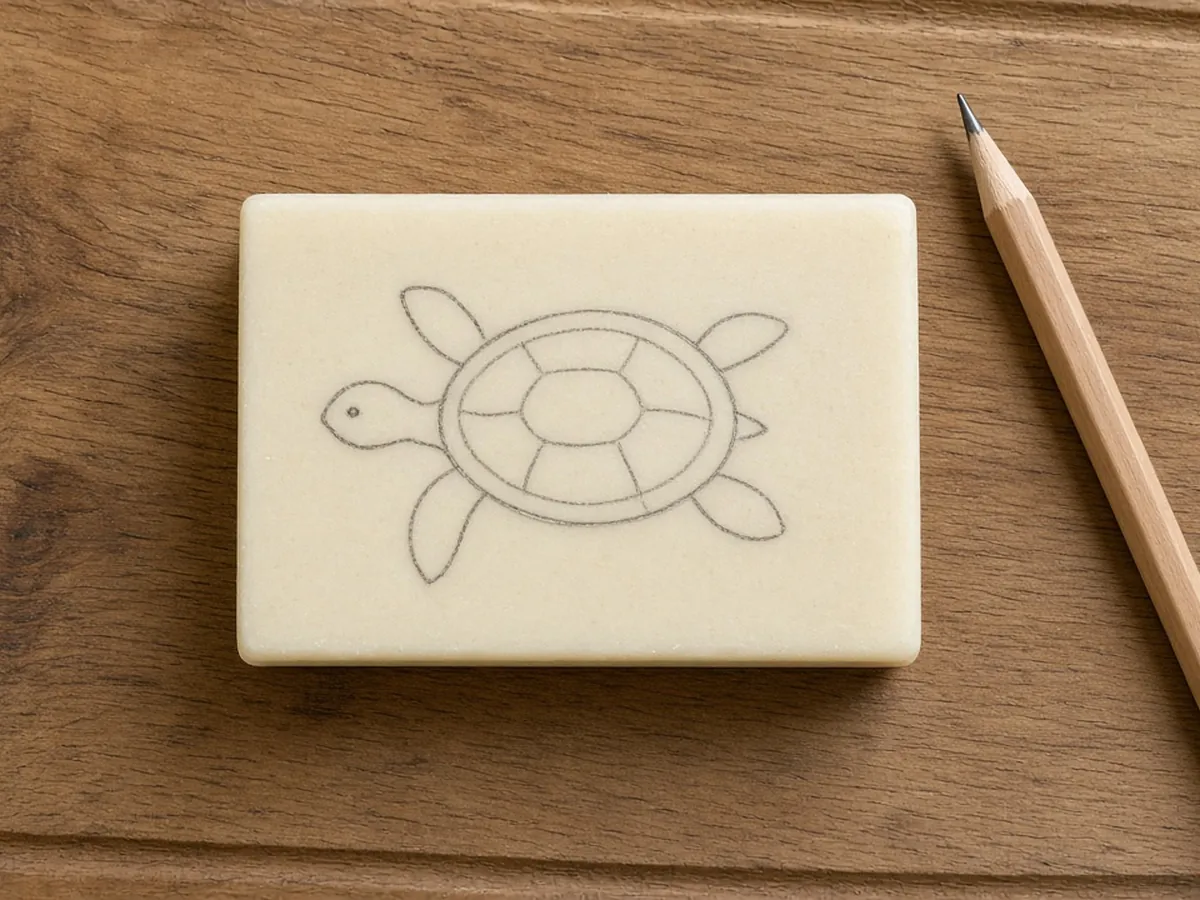
Draw a soft oval across the top, leaving a generous rim. Pare away the shoulders outside it, then bevel the lower edge with light scoops. Build one broad shell, not a bowl. When the outline reads as a turtle from across the table, it’s ready.
3. Add four flippers and a head
Mark four small teardrops at the sides, two at the front and two at the back. Cut the negative space around them, keeping the roots thick and the tips short. Use the remaining front corner as the head and place one eye with the toothpick.
4. Score the shell grid
With the toothpick, draw one head-to-tail line, then two cross-lines that follow the shell’s curve. Press only deep enough to make a shadow. If a line wanders, let the next one follow it. Brush crumbs away and stop before the shell gets busy.
Finished means: it sits flat, every flipper root is thicker than its tip, and the grid catches a soft shadow when you tilt it.
Proportions that make a soap turtle work
- The shell takes up about two-thirds of the bar’s length, with its widest point near the middle.
- The head goes on a short end. Angle the front flippers slightly forward and the back pair slightly out.
- If in doubt, make the turtle smaller inside the bar’s footprint. The extra border gives you room for corrections.
- Check that it sits flat before scoring the shell. Texture can’t fix a rocking underside.
Shell pattern ideas
- Classic grid: one center line and two curved cross-lines (the default above)
- Hexagon plates: a small hexagon in the middle of the shell with lines radiating to the rim, as in the illustration
- Quiet shell: just a center line and two curves. Best for soft or crumbly bars
- Rim line: one shallow line around the shell edge to separate it from the body
Turtle soap sculpture variations
- Hatchling: a rounder shell, a smaller head, and short, wide flippers
- Shore turtle: slightly longer front flippers, with their roots tucked under the shell rim
- Sea turtle relief: keep the bar flat and carve the turtle seen from above as a shallow relief, cutting the background down around it
When the bar answers back
| Problem | Fix |
|---|---|
| Shell texture looks uneven | Stop adding lines, brush clean, and restart from the center with three wide lanes instead of many small cells |
| A grid line went crooked | Follow the shell’s curve with the next line. Matching curves make the first line look intentional |
| One groove is too deep | Lightly plane the neighboring area with the knife |
| A flipper snapped | Round the break into a shoulder. Shorten the opposite flipper only if the balance needs it |
| The turtle rocks | Shave only the high spots underneath |
More fixes: soap carving problems and fixes.
Safety
Use a rounded butter knife, keep the edge traveling away from your fingers, and work on a stable towel rather than in your hand alone. Take breaks when your grip tires. Soap chips aren’t food. Keep them away from children and pets, and wash your hands afterward. See soap carving safety.
FAQ
Is a turtle easy to carve from soap?
Yes. A turtle is one of the easiest animal soap carvings because it’s built from broad, low shapes: an oval shell, a small head and four short flippers. It takes about 25 minutes.
How do I keep the turtle low and stable?
Leave the bottom third of the bar mostly intact while you shape the shell. Check it on the table before adding texture and shave only the high spots that make it rock.
What if my four flippers aren’t even?
They don’t need to match. Keep their roots sturdy and adjust the silhouette around the best one. A slightly uneven pair makes the turtle look hand-carved.
How deep should the shell grid be?
About the depth of a strong pencil line. If the grooves catch a shadow when you tilt the bar, stop. Deeper cuts weaken the shell.
Can I use a scented or colored bar?
Yes, if it’s firm and comfortable to handle. Test one shallow cut first. Very soft, translucent or layered bars can smear or chip.