Editorial check: 2026-09-15 · Written for general education by Soap Carving Lab. Tools can cut; adults should actively supervise children. This is not professional safety advice.
13 Seasonal / beginner project
How to Carve a Christmas Tree.
A Christmas tree soap carving works as a graphic silhouette: broad tiers, a stable trunk and shallow grooves that suggest branches without turning the bar into a pile of fragile needles.
Promise This seasonal project gives you a clear stopping point after three or four tiers, so the tree can look finished before small decorations weaken it.
Begin the six calm passes ↓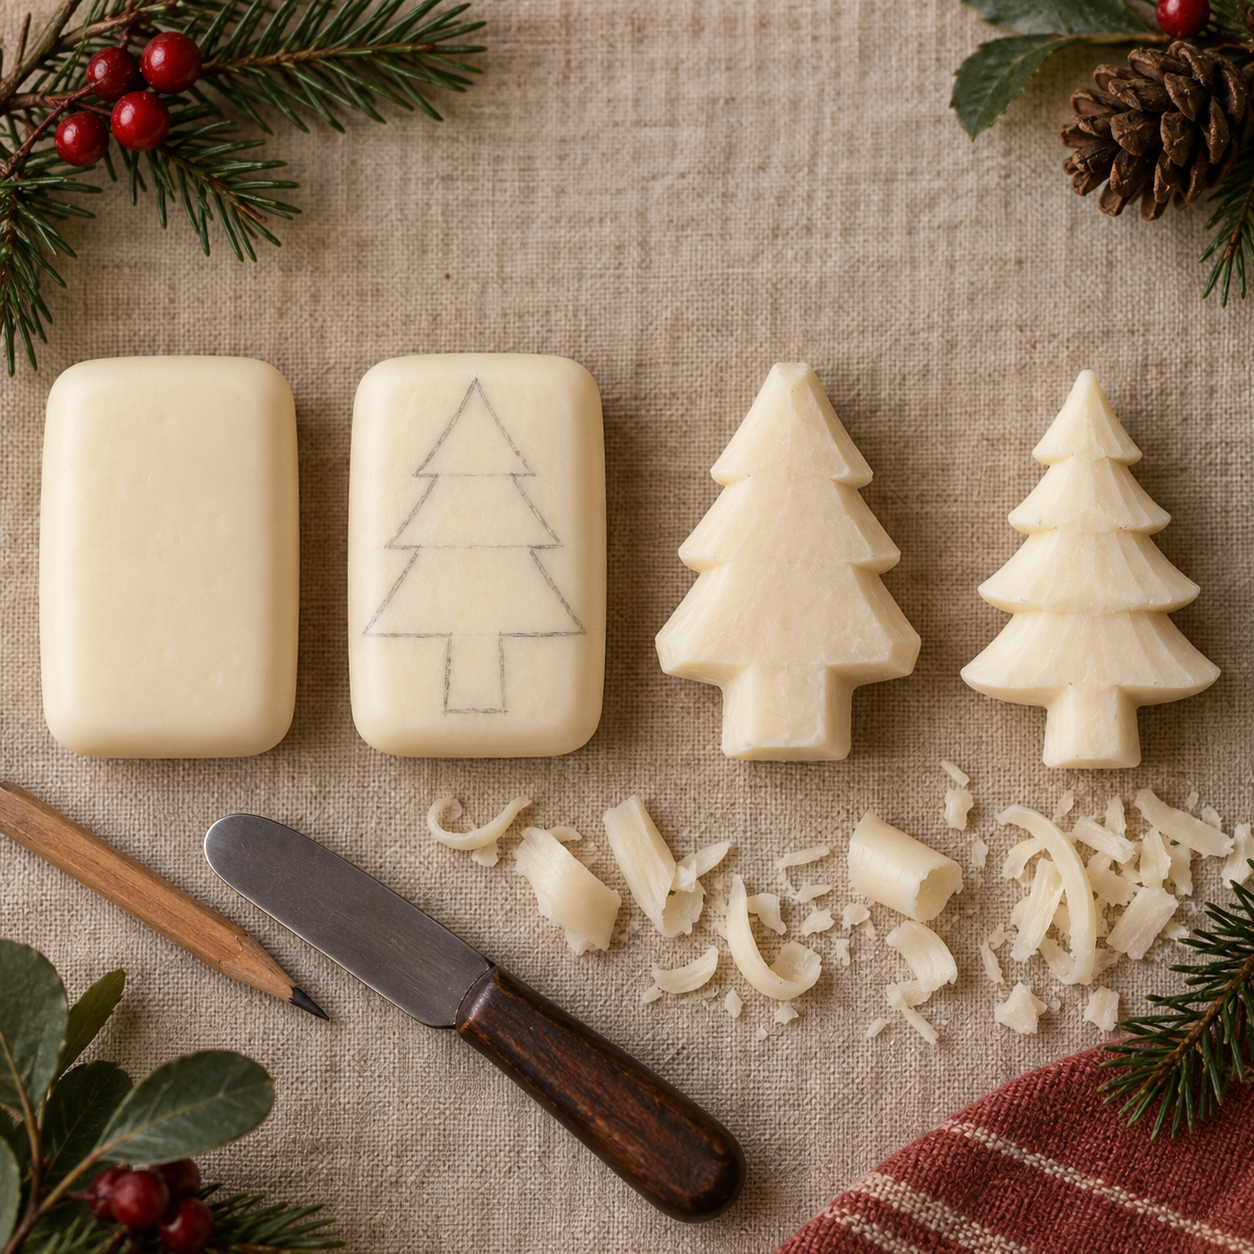
01 Set the bench
Start with a bar that can carry the layers.
Choose a firm, dry, plain bar with a broad face. Draw the tree on the largest face and leave extra soap below the lowest branch for the trunk and base. Work on a towel so the bar does not slide as you turn it.
Test a spare corner before committing. If the soap smears or powders, switch to a flatter relief and fewer tiers. The best soap for carving guide covers the first material check.
- 01Firm soap bar
Use a broad face and keep the base generous.
- 02Rounded butter knife
Make shallow cuts between the tiers.
- 03Soft pencil
Draw three or four simple branch layers.
- 04Dry tea towel
Catch curls and keep the bar stable.
- 05Toothpick
Add one small mark only after the form is safe.
02 Six quiet passes
Build the tree from large to small.
Use the soap carving techniques order: map, clear the outside, lower one space at a time, turn the bar, and stop before decoration becomes the job.
- 01
Orientation / test the bar
Give the base enough room.
Set the bar upright in your mind but carve it flat on the towel. Test a corner with a shallow curl. If it resists, use a wider, simpler tree rather than force.
Keep: a broad lower block for the trunk and foot.
- 02
Sketch / tiered outline
Draw three calm branch layers.
Mark a small top, a middle tier and a wide lower tier. Make the side slopes clear and leave a thick trunk below. A slightly uneven handmade outline is better than a narrow, fragile point.
Remember: each tier needs a strong connection to the center.
- 03
Block / clear the corners
Remove the large waste first.
Shave the four outside corners around the triangular silhouette. Work toward the pencil line in short passes and stop just outside it. The tree should read before you cut the spaces between branches.
Protect: the lower corners and the central trunk.
- 04
Tiers / lower the gaps
Make each branch a shallow shelf.
Cut a shallow V or curved line between the top and middle tiers, then between the middle and lower tiers. Remove less at the center than at the outside so the layers remain joined.
Check: the gap should create a shadow, not split the tree.
- 05
Trunk + surface / add rhythm
Keep the details low.
Round the trunk and soften the branch ends. Add two or three shallow diagonal marks if they help the tree read; skip tiny needles and deep ornament holes. Turn the bar to check that the relief has not become too thin.
Less is more: broad layers make the strongest seasonal shape.
- 06
Base + finish / inspect the form
Let it stand, then stop.
Place the tree on the towel and flatten only the underside that rocks. Round sharp corners, brush away curls and check front, side and end views. Let it air-dry before display; the finished tree does not need glitter or extra cuts.
Finished means: clear tiers, sturdy base and no needle-thin point.
03 Read the form
Let the silhouette hold the season.
A Christmas tree reads through a taper, repeated horizontal tiers and a strong trunk. The branch grooves only add a second layer. If the outline is recognizable from across the table, you already have the important part.
Turn the bar after the major cuts and check its thickness from the end. The soap carving ideas guide has more seasonal and relief shapes that use the same broad-first approach.
04 Rescue plan
Let a broken branch become a curve.
Stop, brush away crumbs and redraw the simpler silhouette. The problems-and-fixes guide is useful when the material behaves differently than expected.
- The top snapped.
- Round the crown into a lower top tier. The tree can be shorter and still read clearly.
- A branch is too thin.
- Fill the gap visually by widening the tier or merging it into the center.
- The base rocks.
- Flatten the underside or widen the trunk. Do not carve away the lower tier to make it look delicate.
- The soap is crumbly.
- Use a two-tier relief, keep the grooves shallow and leave out ornaments.
06 Field answers
Questions from the towel.
What soap is best for a Christmas tree soap carving?
Choose a firm, plain, opaque bar with a broad face. Test a spare corner first and use a bar that gives a clean curl without force, powder or a glossy smear.
How do I keep a Christmas tree soap carving stable?
Leave a broad lower tier and a thick trunk, and flatten the underside only after the main silhouette is complete. Do not cut a narrow point into the base to make the tree look taller.
How many branches should I carve into the tree?
Three or four broad tiers are enough for a clear beginner design. Keep the spaces shallow and connected; tiny needle cuts can weaken the soap without adding much to the silhouette.
Can children make a Christmas tree from soap?
Children can join an adult-led activity only with close, active supervision. The adult should control the tool path and keep soap pieces away from mouths, eyes and pets.
When is the tree finished?
Stop when the tiered outline, trunk and base are clear, the surface is clean, and no thin point feels fragile. A few shallow branch lines are enough detail.